Search results
546 results, page 1 of 11
Jujutsu Kaisen Season 3, Episode 10: “Tokyo No. 1 Colony, Part 4”
Jujutsu Kaisen Season 3 Episode 10, Megumi is finally able to let loose once he learns Yuji succeed. He faces Hari, Reggie, and Hazenoki.
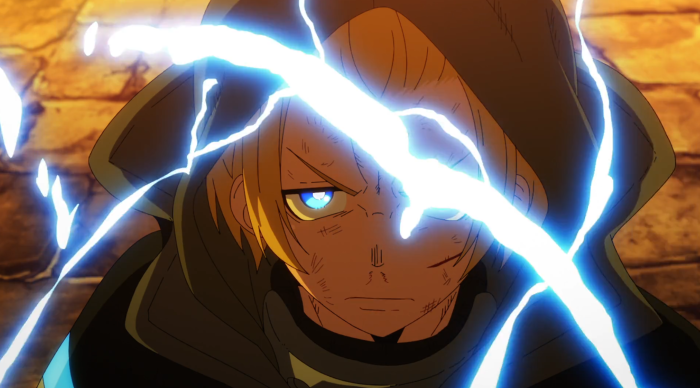
Frieren: Beyond Journey’s End Season 2, A Magnificent End
This is episode is an actioned pack conclusion to the Revolte arc. Genau and Stark face the Divine demon Revolte. At first these two are uncoordinated, crashing into…
Jujutsu Kaisen Season 3, Episode 9: “Tokyo No. 1 Colony, Part 3”
Higuruma activates his Domain Expansion: Deadly Sentencing, which reflects the “courtroom with guillotine.” Yuji tries to attack Higuruma but his domain prevents violence from everyone. Judgeman begins. It…
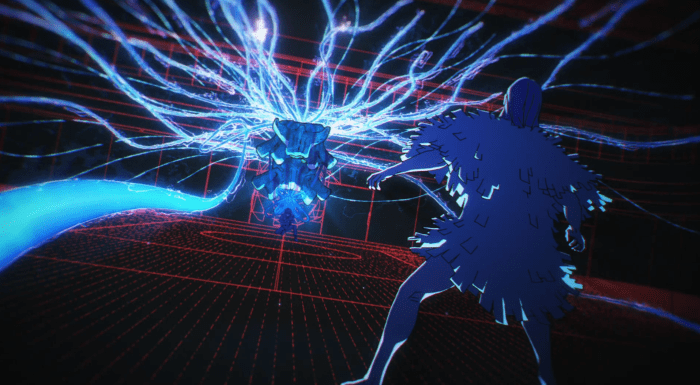
Frieren: Beyond Journey’s End Season 2, The Divine Revolte
Right after the previous episode’s events, Frieren’s group starts planning their next move. Stark and Methode examine the slashing marks left behind by the demon. Methode believes the…
Jujutsu Kaisen Season 3, Episode 8: “Tokyo No. 1 Colony, Part 2”
In Jujutsu Kaisen Season 3, episode 8, it is explained that “in Japan, ninety-nine percent of criminal trials end in a guilty verdict.” Hiromi Higuruma is a defense…
Frieren: Beyond Journey’s End Season 2, A Demon-Slaying Request
Frieren: Beyond Journey’s End Season 2, episode 6, takes a detour from the typical episode of the series. Instead of focusing on flashbacks of her old adventure with…
Jujutsu Kaisen Season 3, Episode 7: “Tokyo No. 1 Colony, Part 1”
Setsuko Sasaki returns. Yuji’s high school friend from the first season, Kenjaku escorts her outside the barrier in Sendai City. He explains his reasons and goals for the…
Frieren: Beyond Journey’s End Season 2, Boshaft—The Emperor’s Spirit
Twenty-nine years after Himmel’s death, Frieren and her party arrive in a small town in the Bier Region. They overhear talk of a Dwarf named Fass who has…
Jujutsu Kaisen Season 3, Episode 6: “Cog”
Panda and Megumi take out several guards, as Megumi shows off some new dimensions of his shadow ability. They regroup on the roof where Kirara see them and…
Frieren: Beyond Journey’s End Season 2, Other People’s Homes
Fern asks Frieren to choose between two outfits. Frieren is no help because she’s still sleepy. She claims that the dresses are the same and asks Fern to…

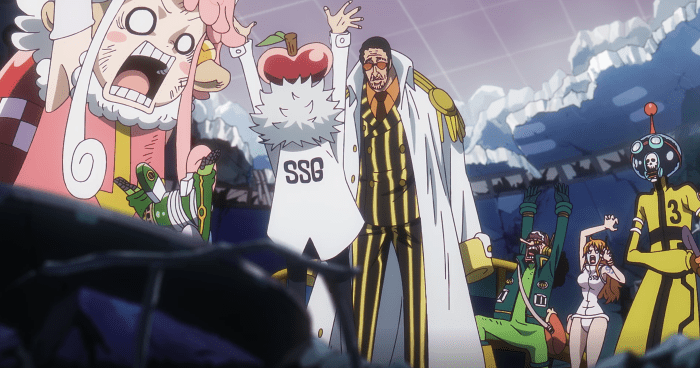
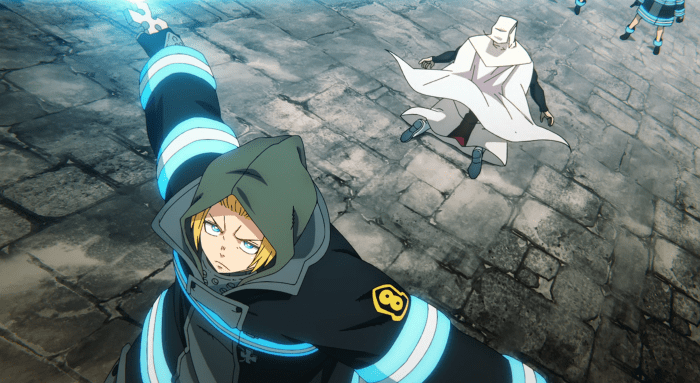
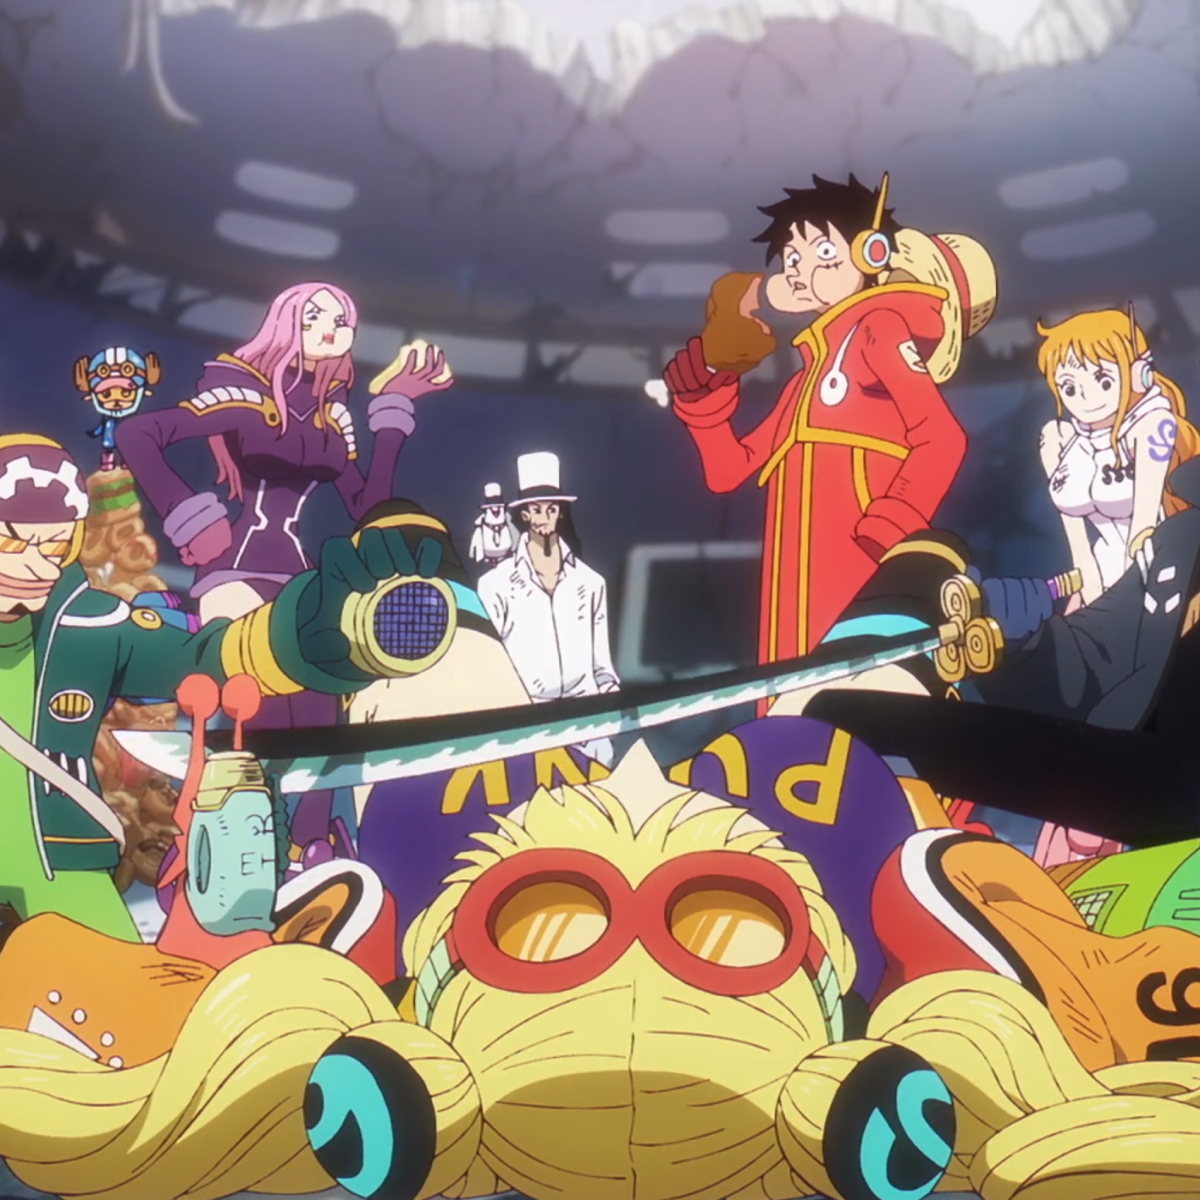
One Piece Episode 1127 and 1128: “Luffy vs. Kizaru! A Fierce Kaleidoscopic Battle”
One Piece Episode 1127, the Strawhat crew gets in trouble as Elder Saturn arrives in dramatic fashion and prepares to wreck havoc.
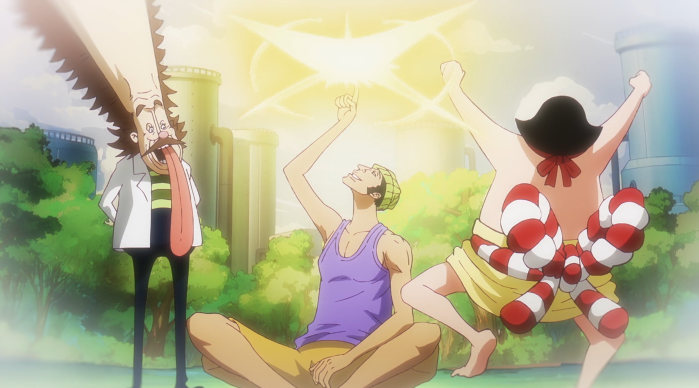
Fire Force Season 3, Episode 5:”Chance Meeting With an Arch-Enemy”
Fire Force Season 3 Episode 5, I don't think Arthur can defeat Dragon on his own. I wonder if someone else will help him.
One Piece Episode 1126: “Looming Despair! Admiral Kizaru’s Depressing Mission”
One Piece Episode 1126, Luffy goes Gear 4: Snakeman and starts hitting Kizaru, but even with the speed boost, he can’t keep up.
Fire Force Season 3, Episode 4: “Golden Secret”
Fire Force Season 3, Episode 4, "Golden Secret", centers on Company 8's battle against the White Clad's, without, Arthur and Shinra,

One Piece Episode 1125: “A Clash of Two Men’s Determination! Kizaru and Sentomaru”
In One Piece Episode 1125, Sentomaru and Admiral Kizaru square off as the former tries to protect Vegapunk.

Fire Force Season 3, Episode 3: “Incarnation of flame”
Fire Force Season 3, Episode 3: “Incarnation of flame”, Company 8 faces against the White Clad Destroyers and Joker and Shinra fights Captain Burns.
One Piece Episode 1124: “Completely Surrounded! The Operation to Escape Egghead”
Luffy uses York’s Den Den Mushi to talk to the Five Elders and tries to make a deal—he’ll spare York if they let him leave Egghead with Vegapunk.…

Fire Force Season 3, Episode 2: “Prisoner”
Fire Force Season 3, Episode 2: “Prisoner”, reintroduces Joker to the series. Along with Viktor Licht, Joker was initially presented as a villain. He became disillusioned with the…
One Piece Episode 1123: “The World Shakes! The Straw Hats’ Hostage Situation”
One Piece Episode 1123, Kizaru arrives to Egghead Island and York betrayal isn't going as planned, as the Marines don't want to save her.

900th Post Special Feature: “Top 9 tips from 900 posts”
When I started this blog back in 2013, I was certain no one would read anything I wrote. I always had a love hate relationship with writing. What…

To Be Hero X – Episode 1
To Be Hero X is a pleasant surprise. It's a well animated series with some dark humor, social commentary, mystery, and impressive action.

Fire Force Season 3, Episode 1: Indomitable Resolve
Fire Force Season 3 Episode 1 successful manages to reintroduce the series and remind us of what previously happened and what's at stake.

Solo Leveling Season 2, Episode 13 (Finale)
Solo Leveling Season 2 Episode 13 was a perfect ending to this season. Jinwoo continues to be impressive as he climbs up the ranks.

Sakamoto Days Episode 11 Review: Casino Battle
Sakamoto Days Episode 11, Sakamoto gets a new team member, learns more about Slur, and prepares for a new threat.

Solo Leveling Season 2, Episode 12
Solo Leveling Season 2 Episode 12, The Ant King and Jinwoo finally face off and despite his power, Jinwoo dominates in the end.

Sakamoto Days Episode 10 Review: Bathhouse Roughhouse
Sakamoto Days Episode 10, Sakamoto and his family enjoy a day out at the bathhouse. They meet someone with info on the bounty.

Solo Leveling Season 2, Episode 11
Solo Leveling Season 2 Episode 11, sees the Ant King dominate the S-Ranked Hunters, slaughtering half of them with one hit.

Sakamoto Days Episode 09 Review: All Aboard
In Sakamoto Days episode 09, Shin and Heisuke team up against Seba, while Sakamoto faces Kashima.

Solo Leveling Season 2, Episode 10
Solo Leveling Season 2 Episode 10, the hunter train against each other. Eventually, Jinwoo joins them but refuses to go on the mission.

Sakamoto Days Episode 08 Review: Sakamoto’s vs. the Lab
Sakamoto Days Episode 08 reveals how Shin got his powers. He drank some green contents from a tube and apparently gained his powers.

Solo Leveling Season 2, Episode 9
Jinwoo finally crafts the Elixir of Life, healing his mother. Curing his mother was the main reason he became a hunter. It’s rare that a character reaches his…

Sakamoto Days Episode 07 Review: Jurassic Bastard
Sakamoto Days Episode 07, Shin and Taro try to rescue Lu from some assassins that have taken over the Labs.

Solo Leveling Season 2, Episode 7
In Solo Leveling Season 2, Episode 7, Jinwoo heads back into the Demon’s Castle to finish his climb to the 100th floor.

Sakamoto Days Episode 06 Review: Heisuke Mashimo
Sakamoto Days Episode 06, introduces us to a new character, sniper, Heisuke. Will he be the one to get the bounty for Sakamoto?

Solo Leveling Season 2, Episode 6
Solo Leveling Season 2 Episode 6, Jinwoo shows off his unmatched power in front of an audience including, Jinchul and Cha Hae In.

Sakamoto Days Episode 05 Review: Source of Strength
Sakamoto says he’s done messing around—it’s time to fight for real. Boiled scoffs, asking if Sakamoto really thinks dropping a few pounds out of nowhere gives him a…

Solo Leveling Season 2, Episode 5
Episode 5 of Solo Leveling Season 2, shows Sung Jinwoo into another mess when he joins the Hunters Guild’s secondary strike team.

Sakamoto Days Episode 04 Review: Welcome to Sugar Park
Lu applies eye-drop antidote on Shin, steady and precise. Meanwhile, Taro presses Tatsu, demanding to know who hired him. Tatsu smirks, asking if telling the truth would buy…

First Volume Up – Jagaaaaaan Manga Volume 1: Recap and Review
Jagaaaaaan is a series from Kaneshiro Muneyuki and illustrated by Nishida Kensuke. Published by Big Comic Spirits, the series follows cop Jagasaki.

Solo Leveling Season 2, Episode 4
In Solo Leveling Season 2 Episode 4, Jinwoo is looking for the last material for the Elixir of Life. He joins a mining crew, to make money.

Sakamoto Days Episode 03 Review: Welcome to Sugar Park
Sakamoto Days Episode 03, Nagumo is an "old friend" of Sakamoto. He warns Sakamoto that theirs a bounty on his head for 1 Billion Yen.

Solo Leveling Season 2, Episode 3
Solo Leveling Season 2 Episode 3, Jinwoo continues to level up as he tries to gather the ingredients for his mother's cure.

Sakamoto Days Episode 02 Review: Vs. Son Hee and Bacho
With Lu, Sakamoto fills out the traditional, male, male, and female trio. Hopefully, Lu will be more important than her female counterparts.

Solo Leveling Season 2, Episode 2
Solo Leveling Season 2, Episode 2 concludes the red dungeon, as Jinwoo faces the dungeon boss, Barka. Will he save the lower ranked hunters?

Sakamoto Days Episode 01 Review: The Legendary Hit Man
Sakamoto Days Episode 01 introduces us to Taro Sakamoto, he's the strong silent type. However, despite his size he's still lethal.

First Volume Up – Vagabond Volume 1: Takezo Arc
Vagabond Volume 1 introduces us to the two main protagonists, Matahachi Honiden and Musashi Miyamoto as they survive a war.

Solo Leveling Season 2, Episode 1
Solo Leveling Season 2 Episode 1 sees Jinwoo enter a red gate after it transforms form a C-Ranked one, there he encounters ice bears and elves

First Volume Up – Kagurabachi Volume 1: “Mission”
Kagurabachi Volume 1 ticks a lot of boxes for me—humor, action, interesting characters, an engaging story, and breathtaking art.

Dandadan Episode 12 Recap and Review
Dandadan Episode 12, Jiji, Momo, and Okarun head off to visit, Jiji's family home. While traveling, Okarun and Jiji get closer.

Dandadan Episode 11 Recap and Review
In Dandadan Episode 11, When Momo sees Jiji again, she’s shocked, and Okarun can’t help but size him up, thinking he looks tough.